
While it may look simple, setting up email on your iPhone can be tougher than it looks. Read SaneBox's step by step guide here for full details.
1. Start at the Home screen and go to iOS Settings.
2. Tap into the Mail category.

3. Under the Mail Settings section, tap into Accounts.
4. Now select the IMAP based account you'd like to check or adjust.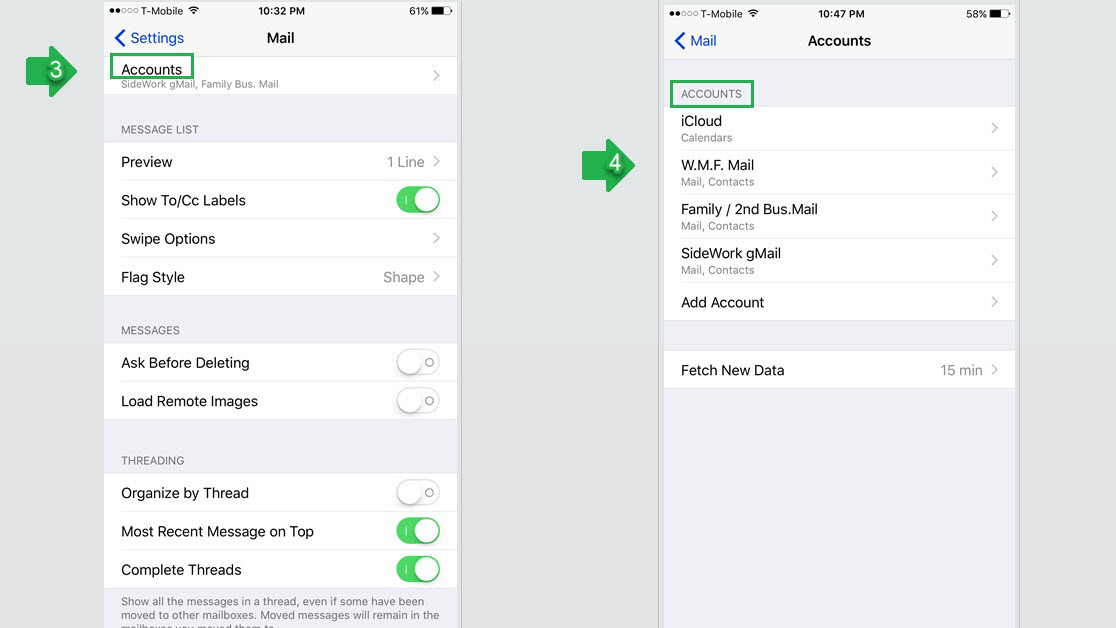
5. For the next step select Account.
6. Look to "Advanced", and tap on the Mail line item.
7. Advanced again, as an additional level we'll need to tap into to go further.
8. Choose "Sent Mailbox".
9. Check or change Sent folder settings. Coordinate to store Sent mail in your choice of Sent or Sent Items folder on your host's server.
(Note: Sent setup is a preset for some hosts and so you won't always see these choices.)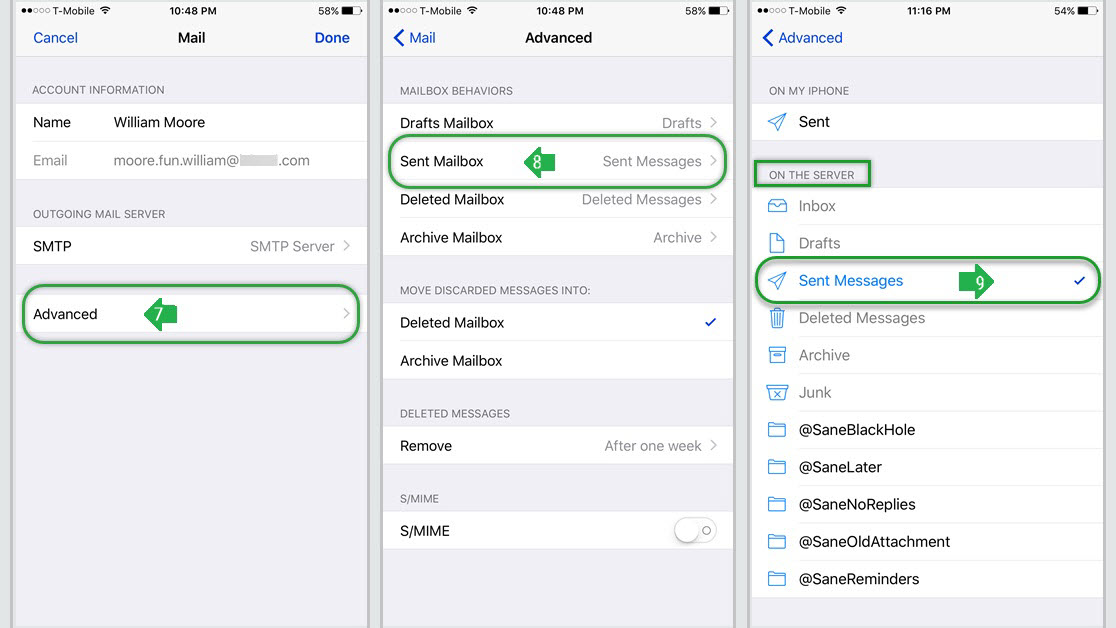
Finish by tapping to back your way out (top-left) on your iPhone/iPad screen, while carefully watching for the choice to select *Done* (top-right) to complete your adjustments or setup check.
Haven't tried SaneBox yet? Find out how it can help make your Inbox priority pure. Sign up here and claim your free 14-day trial.