With the iOS 11 debut, Apple has delivered a fantastic new (1st of its kind) built-in Screen Recording tool. Now it's easy to make a video to show what's happening on your iPad or iPhone screen. This is a perfect solution for when you run into something neat you want to show off and share or (joy oh joy) for when there's something you need help with.
Add a Record Screen button to your iOS11 Control Center
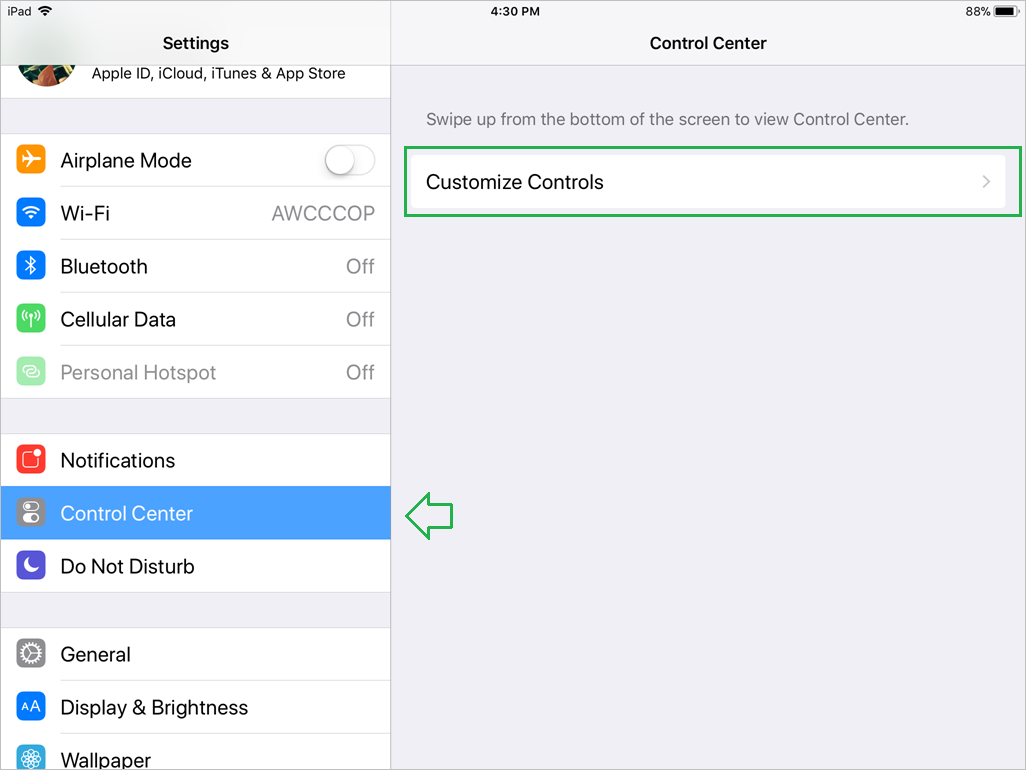
1. iOS Settings, tap into Control Center settings, choose Customize Controls.
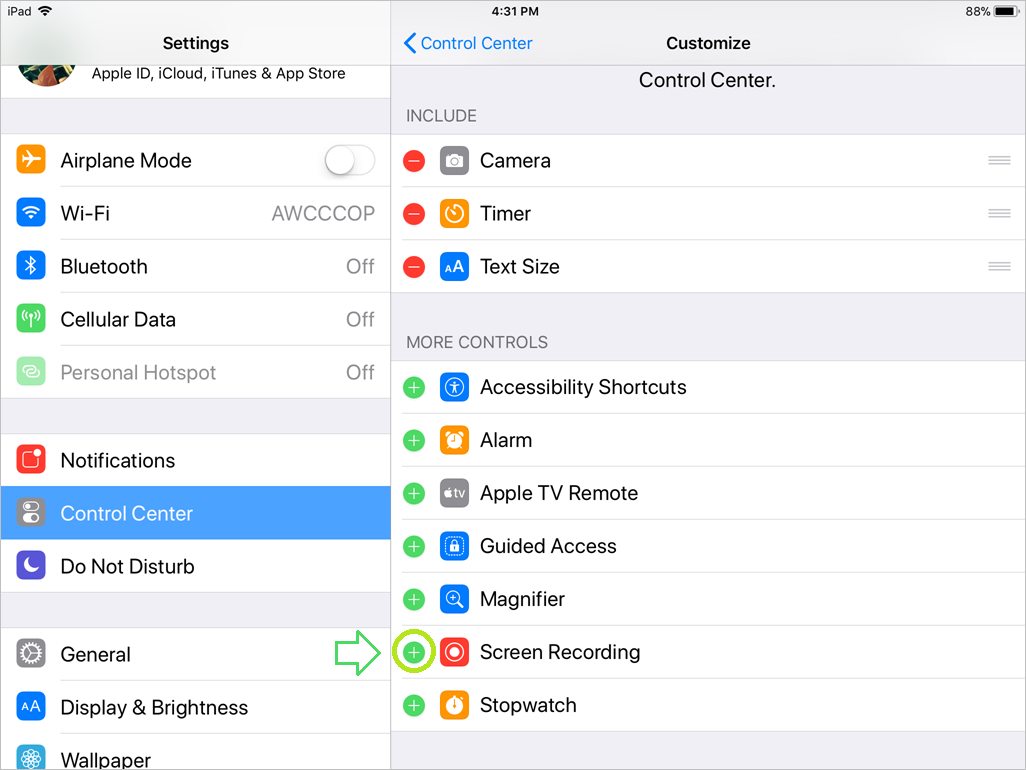
2. Tap the green plus next to Screen Recording to add it to your Control Center.
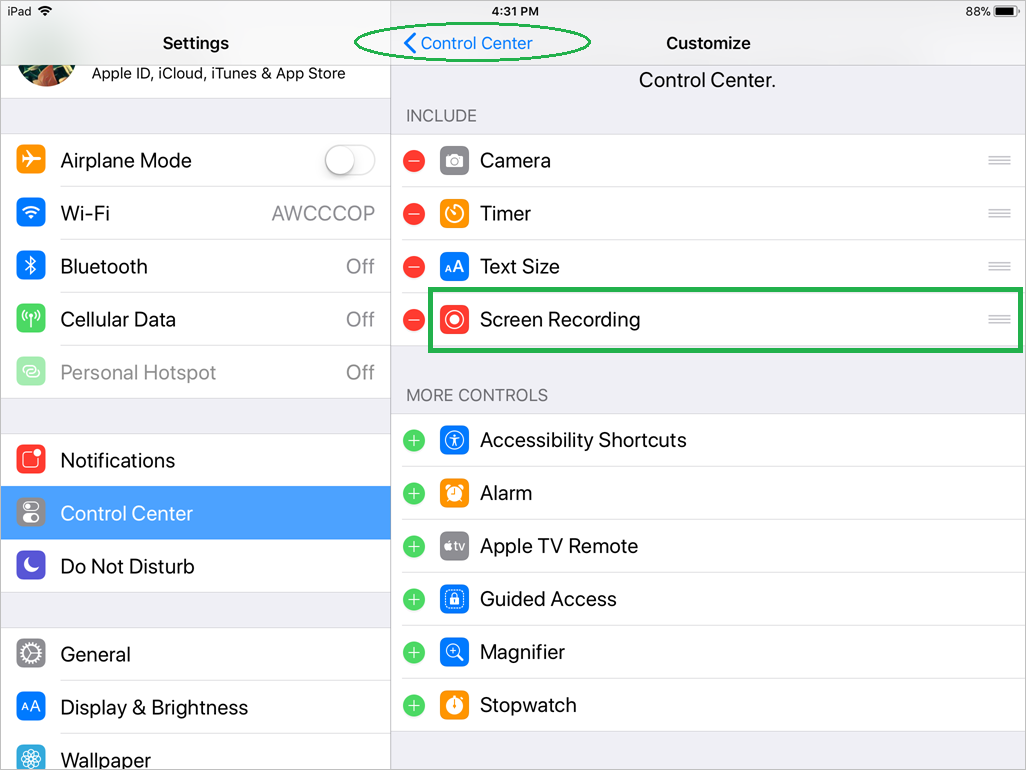
3. Make desired adjustments, hold ![]() to drag & re-order, then return to Home screen.
to drag & re-order, then return to Home screen.
4. Swipe-up from bottom of screen to open the Control Center, and try out Recording.
- Begin recording, then simply go back to the app or screen(s) you'd like to record.
- Finish by returning to the Control Center to stop and complete recording.
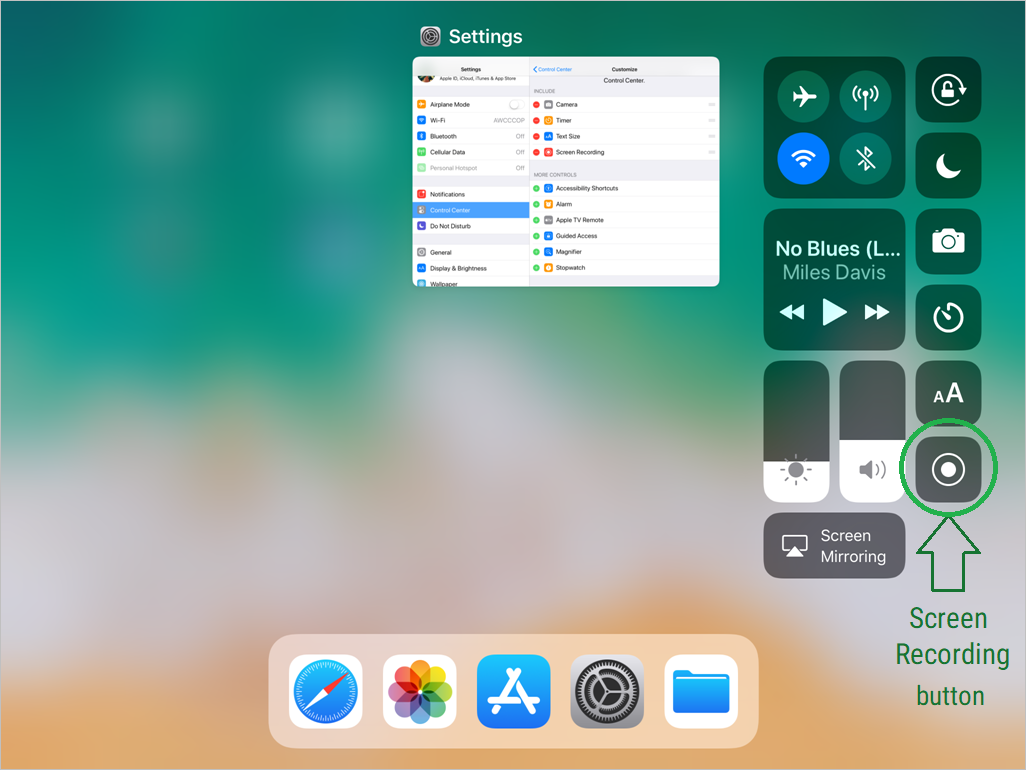
5. For optional video narration, tap and hold the Screen Recording button instead.
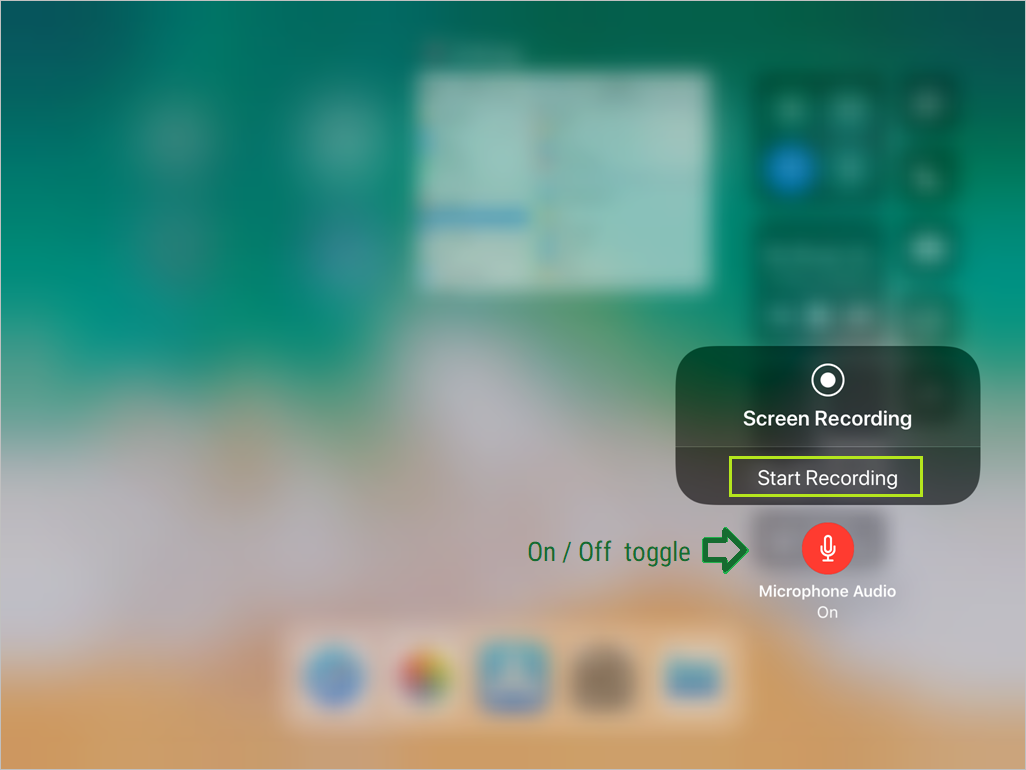
NOTE: Keep screen capture video short and to the point in order to control file size. After completing your screen-recording, use your iOS Photos app to locate and share your video with our support team.
Tip: Avoid sending by Email attachment (iOS may send us a lower-quality version that way.) Share the recording of your screen with us through dropbox or Google Drive, sending us the link to the shared file.
Write to our SaneBox support team via support@sanebox.com and include details about what brand of email app software or web browser you're working within.
If you just need to capture a still image and a video recording isn't necessary, then try this guide on capturing screenshots.
